Writing Your Own Config¶

Starting Out¶
Any time you get confused during this process save yourself the stress and join our support discord for realtime help on writting your config file.
Use the sidebar as your guide on where fields are in terms of brace or bracket ladders.
We suggest using an app such as Sublime Text which has a HOCON module that can aid you in properly formatting your config files.
Very important: Please make sure you save your config in UTF-8 ecoding the first time you save! It will prevent a lot of potential problems for your config. Please note that HOCON does sort everything within ladders alphabetically.
Your first line of every config is always going to be crates {. This is necessasry to indicate that this is crates information
The next line is where your first crate is initiated this is your crate_id which you will use to call your crates in commands. Give it an easy to type name and type on the next line your <crate_id> {.
You can have as many crates as you want but lets make your first crate.
Items¶
The first and most important part of a crate is its items, items are an array which means it starts as shown:
items=[
{
The open brace marks your first reward that can be given in your crate. To add another reward, once you’re done add a comma after the closing brace.
count¶
count=<int>
Your count dictates how many of an item are given to the player. If your item is a command this should be set to 1.
Huskydata¶
Huskydata is where all information in the scope of crate rewarding happens. Nothing in terms of inventory apperance is here yet.:
huskydata {
    rewards=[
Note that rewards is an array like items is, this allows you to give more than one item or run multiple commands when the crate is opened.
Rewards¶
There are two ways you can do rewards
| Item | Command |
|---|---|
type=item |
command=<> |
type=command |
Override Item (Optional)¶
If you want your item to be displayed as something else inside your crate use overrideItem.:
overrideItem {
    id="<item_id>"
    count=<int>
    name="<name>"
    lore=[
        "<lore>"
    ]
}
Override Reward Name (Optional)¶
overrideRewardName="<string>"
Optional to change the name shown for a reward.
Override Count (Optional)¶
overrideCount=<int>
Optional to change the amount of items given for a reward. This
Treat as Single (Optional)¶
treatAsSingle=true
Optional to have grammar for items with more than one appear as if the item was singular.
Announce (Optional)¶
announce=true
Optional to have a specific reward be announced on the server. This is required to display your rewardAnnounceMessage in lang options.
Weight¶
weight=<int>
This is your probability for a reward inside a specific crate. The sum of your weights doesn’t have to equate 100. The smaller the number the more rare an item will become to rewarded.
Weight is not inside of huskydata it should not be in the same ladder as rewards.
Lang (Optional)¶
Lang would be used inside of a specific reward if you wanted an item to have customized messages from others inside the crate. This overrides all other lang options.
NBT Tags (Optional)¶
nbt {
    your_fancy_tag {
        your_fancy_field = <your_fancy_value>
    }
}
To use NBT tags with husky crates simply put all the necessary tags in the proper format.
Item ID¶
id="minecraft:<item>" or id="<plugin>:<item>"
Give the item the proper identifier so that HuskyCrates can properly give the user an item.
Lore (Optional)¶
lore=[
"<some text describing the item>"
]
Lore describes the item the user gets showing in the tooltip when hovering over the item in the menu. Lore is an array like items and rewards, each line should be in its own quote.
Enchants (Optional)¶
enchants {
    <enchantment>=<int>
}
Place this in any item you want enchanted with the type of enchantment and the level.
Name¶
name="<item name>"
You must give the item a name to be displayed as in their inventory, you can use color codes using the & symbol the § is heavily unrecommended.
Crate Options¶
To add a crate option first do options {
Crate Display Name¶
name="<crate name">
Give your crate its name displayed in holograms and announcements, here you can give them text formatting using the & symbol.
Lang (Optional)¶
Lang would be used inside of specific crates to give them customized messages. This overrides global lang options if you have them.
KeyID (Optional)¶
keyID="minecraft:<item>" or id="<plugin>:<item>"
Change the item given to the player to open this crate.
CrateBlockID (Optional)¶
crateBlockID="minecraft:<block>"
Changes the block and appearence of a specific crate.
ShowRewardsOnLeft (Optional)¶
showRewardsOnLeft=true
Allows users to see potential rewards on primary action (punching the chest)
Particle Colors (Optional)¶
particle1 {
    color=[
        0,
        0,
        0
    ]
}
particle2 {
    color [
        0,
        0,
        0
    ]
}
Use this option to change the colors of the particles, Minecraft only supports RGB colors, click here to use a color picker. Take the numbers from it and replace them in order in the config.
Spinner Options (Optional)¶
spinnerOptions {
    dampening=1.05
    maxClickModifier=0
    maxClicks=45
    minClickModifier=0
}
The current values here are the defaults.
Changing the dampening would affect how quickly the clicks will reach the maxClicks. The higher the number the longer it will take to receive the item.
maxClickModifier and minClickModifier can allow the number of clicks to be randomized from the maxClicks value in the range defined between these.
Free Crate (Optional)¶
Place freeCrate=true in addition with, not required but heavily suggested freeCrateDelay=<seconds>. For instance you wanted players to open this crate daily set your time to 86400.
If you did an option make sure to close your brace before type.
Crate Types¶
type="<options_below>"
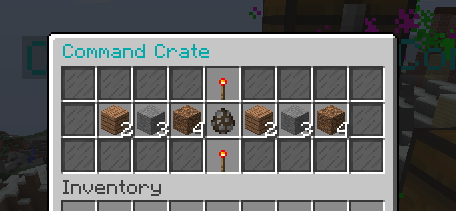
Spinner View spinner - Traditional HuskyCrates view, similar to CS:GO case. Items scroll randomly until an item is picked, spinner view is customizeable.

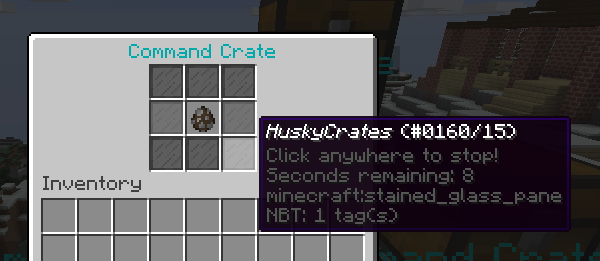
Roulette View roulette - You have 10 seconds to make a selection, weight still affects how often items appear.

Instant View instant - No GUI is shown and items are recieved instantly with only a rewarding message appearing.
Simple View simple - Basically an instant view but with a short GUI display similar to roulette view.
Lang Options¶
This is an optional feature, here are all the options that can be changed from the default:
Rewarding Options¶
Prefix = "<>"
The prefix is before the entire reward message, in front of the >>. There must be a space between the prefix and the rest of the text so either the prefix must have a space or it must be formatted like ``%prefix% ``
rewardMessage = "<>"
The message used to describe the reward given to the player. You can use all non key formatting text.
rewardAnnounceMessage = "<>"
A public announcement to players on the server. To enable this announcement for a particular reward you must place announce=true inside your rewards ladder.
noKeyMessage = "<>"
Message to the player to tell them the don’t have the right key. This wouldn’t make sense to have for an item, only per crate or global.
Text Formatting¶
Where applicable, capital letters result in romatted text, lowercase have the formatting characters stripped resulting in plain white text. Options include:
%a - "a" or "an" depending on reward grammar
%R / %r - Reward name
%C / %c - Crate name
%P / %p - Player name
%K / %k - Key name
%prefix% - required to show prefix
Virtual Key Options¶
withdrawInsufficient = "<>"
When a player withdraws more from their virtual key bank than what they have. Can use %amount% & %bal%.
withdrawSuccess= "<>"
When a player successfully withdraws from their virtual key bank. Can use %amount%.
depositSuccess= "<>"
When a player deposits keys into their virtual key bank. Can use %amount%.
vkeyUseNotifier = "<>"
Notifies the player that they used a virtual key from their bank and notifies them of their balance. Can use %bal%.
If you made it here you successfully built a HuskyCrates config! Now that you have your config built check out the commands page in the sidebar if you haven’t already. Go test your config, if you run into any problems make sure you check your syntax to make sure you didn’t leave a brace or bracket without a friend or forgot a comma between items. The server console can help you in finding these issues as well by indicating the line in the config and the issue it has with it.